Vinyl records have made a significant resurgence in recent years, with audiophiles and casual listeners alike rediscovering the unique sound quality they offer. However, for vinyl records to sound their best, they need to be properly cared for and maintained. One of the most crucial aspects of vinyl care is cleaning, as dirt, dust, and oils from fingerprints can degrade the sound quality and cause damage over time. Many cleaning methods exist, but one popular, affordable option is using vinegar. In this guide, we will explore the benefits and risks of cleaning vinyl records with vinegar, the right methods to use, and alternative cleaning solutions for maintaining your vinyl collection.
Why Cleaning Your Vinyl Records Is Important
Before diving into vinegar cleaning, it’s important to understand why cleaning your records is essential. Over time, dust and dirt can accumulate in the grooves of a vinyl record, causing the stylus (needle) to skip, misinterpret, or even damage the grooves. This leads to unwanted pops, crackles, and distortion when the record is played. Cleaning your vinyl records properly can help preserve the sound quality and lifespan of both the record and the stylus.
Regular cleaning also prevents the build-up of grime and oil from fingers, which can affect both the sound and the visual aesthetics of the record. Additionally, proper cleaning can protect your vinyl from mold and mildew growth, which thrives in warm, humid conditions.
Why Vinegar?
Vinegar is often suggested as a household solution for cleaning vinyl records because it is a versatile and inexpensive product that many people already have on hand. White vinegar, in particular, is favored for its non-abrasive properties and ability to break down grease, grime, and dirt. It’s important to note that while vinegar can effectively clean, it must be used carefully, as improper use can potentially damage the record.
Benefits of Using Vinegar for Vinyl Cleaning:
- Cost-Effective: Vinegar is inexpensive and readily available in most households.
- Non-Abrasive: Vinegar is a gentle cleaner that won’t scratch the vinyl.
- Disinfecting Properties: Vinegar has mild antibacterial properties, which can help remove harmful microorganisms from your records.
- Gentle on the Environment: Unlike many chemical-based cleaning solutions, vinegar is eco-friendly and free of harsh chemicals.
Risks and Considerations:
- Acidity: Vinegar is mildly acidic, which means it could potentially damage the vinyl if used in excess or if it’s not properly diluted.
- Residual Odor: Vinegar has a strong scent that may linger after cleaning. This can be reduced by rinsing the records thoroughly after cleaning.
- Not for Deep Cleaning: Vinegar is effective for routine cleaning but may not be suitable for deep cleaning or for removing stubborn mold or mildew.
How to Clean Vinyl Records with Vinegar
If you decide to use vinegar to clean your vinyl records, it’s important to follow the right steps to avoid damage. Below is a detailed step-by-step process for cleaning your records with vinegar.
Supplies You’ll Need:
- White vinegar (preferably distilled)
- Distilled water (tap water can leave mineral deposits on your records)
- A clean microfiber cloth or soft, lint-free cloth
- A record cleaning brush (optional, but recommended for surface dust)
- A spray bottle or cleaning solution bottle (optional)
- A record cleaning mat or soft surface to lay the record on
Step-by-Step Guide:
- Prepare Your Cleaning Solution: The first step is to mix your vinegar solution. The ideal ratio for cleaning vinyl records is 1 part white vinegar to 3 parts distilled water. This dilutes the acidity of the vinegar while still retaining its cleaning properties. For example, you can mix 1 cup of vinegar with 3 cups of distilled water in a spray bottle or bowl. If you prefer to use a bowl, you can simply dip the cloth into the solution, ensuring it’s not too soaked.
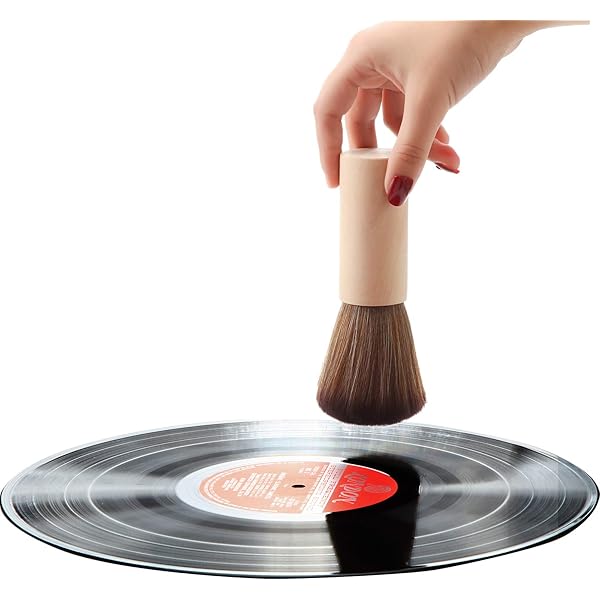
- Dust the Record: Before applying any cleaning solution, it’s important to remove surface dust and debris. Use a record brush or microfiber cloth to gently wipe the surface of the record. Do this in a circular motion along the grooves, always moving in the same direction as the grooves to avoid pushing dirt into them. This will prevent any large particles from scratching the vinyl when cleaning with the vinegar solution.
- Apply the Cleaning Solution: Lightly spray the vinegar and water solution onto the record, but don’t soak it. Alternatively, you can dampen your cloth with the solution and gently wipe the surface of the record. Be careful not to let any solution seep into the label area, as this can cause the label to degrade over time. If you’re using a spray bottle, spray the solution from a distance of about 12 inches (30 cm) to prevent excess liquid from pooling on the record.
- Wipe the Record: With a soft microfiber cloth, gently wipe the record in a circular motion, following the grooves. Avoid using excessive pressure. This step helps break down any oil, grease, or dirt accumulated on the record surface. Be sure to cover the entire playing surface without going over the label.
- Dry the Record: After cleaning, use a dry, clean microfiber cloth to wipe the record dry. This step is crucial to ensure no excess moisture remains on the vinyl, which could cause warping or residue build-up. Gently buff the surface to remove any remaining water or vinegar solution. If there is any noticeable streaking, repeat the process with a clean, dry cloth.
- Allow the Record to Air Dry: Once you’ve wiped the record clean, place it on a flat surface, such as a drying rack or a soft towel, and allow it to air dry for 15-20 minutes. This ensures any remaining moisture evaporates completely before storing the record.
- Store Your Records Properly: After cleaning and drying, store your records vertically in a cool, dry place, away from direct sunlight and humidity. Use anti-static inner sleeves to protect the record from accumulating dust again.
Alternative Cleaning Methods
While vinegar can be effective for light cleaning, it may not be sufficient for heavily soiled records or for deep cleaning. For those situations, consider the following methods:
- Commercial Vinyl Record Cleaners: There are various record cleaning solutions available that are specifically designed for vinyl. These are usually safe for records and can offer better results for stubborn dirt and grime.
- Ultrasonic Record Cleaning: An ultrasonic cleaner uses sound waves to create microscopic bubbles that gently remove dirt and dust from the grooves of the record. This method is considered one of the most effective, though it’s more expensive and typically used by serious collectors.
- Dish Soap and Water: A gentle mix of dish soap and distilled water (without vinegar) can be used to clean records. This is ideal for records that need a more thorough cleaning.
- Isopropyl Alcohol: A solution of 70% isopropyl alcohol and distilled water can be effective for cleaning records, especially if mold or more stubborn grime is present. However, alcohol should be used sparingly, as it can dry out the vinyl over time.
Also Read: – Most popular vinyl records
Final Thoughts
Cleaning vinyl records with vinegar is an inexpensive and effective way to keep your records in top condition. By following the proper steps and using the right cleaning solution, you can ensure that your records retain their optimal sound quality for years to come. However, always remember to use vinegar in moderation and consider other cleaning methods when deeper cleaning is necessary. With the right care and attention, your vinyl records will continue to deliver their unique sound and bring joy to your music collection for many years.

An Electronics Engineer & A MBA in Marketing Graduate, Kinjal Gosar is a passionate audiophile herself. Starting her career at India’s biggest Consumer Electronics Retail Chain, her technical knowledge is amazing. Classic Rock has been a huge part of her life and her love for Music has always been evident in all her work. A vinyl collector herself, she loves spreading the joy of analouge while giving nothing but the best to her fellow vinylheads.


